I spend the last few months preparing the bike, buying some new gear and adjusting things around. Most of the gear is the same with my previous trip and on top of that, I added a front rack. Everyone was suggesting low-rider racks and two small panniers that sit lower than the wheel’s axle. This distributes weight in a better way and increases the stability of the bike. I thought about following this sensible advice, but in a way I didn’t want to have to deal with two extra bags and spend at least $200 on the extra panniers. I decided to use just one waterproof bag, which I already had, on the top of the rack for simplicity. In this bag I will be storing all the food related stuff, so it’s easier to manage, take out when I am hungry, but most of all leave me a little extra space in the main panniers for more clothes.

All the clothes
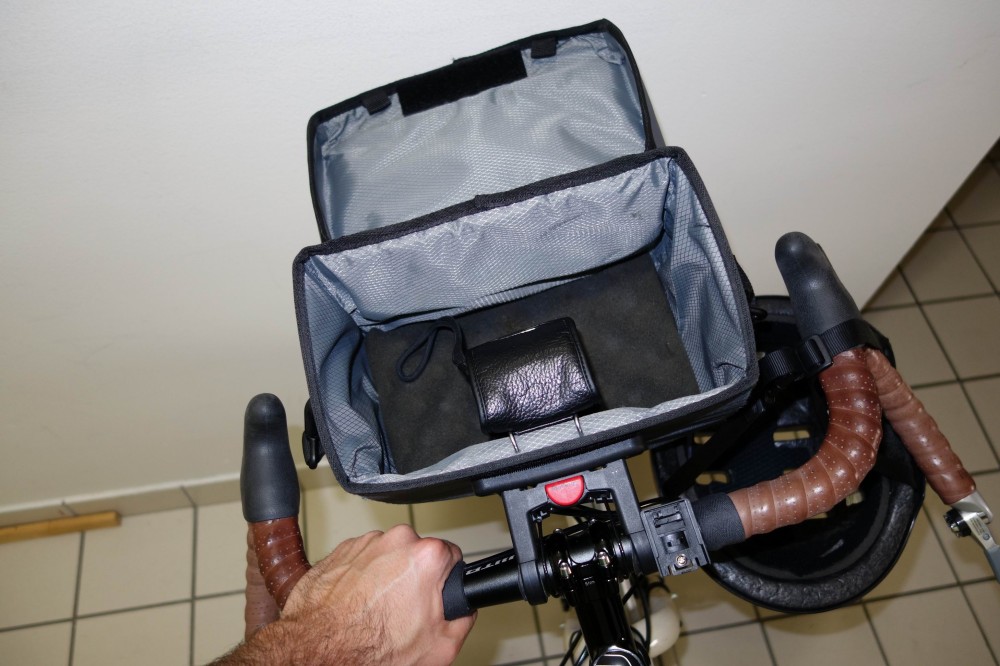
While having loads of time to kill, I came with a DIY modification on my handlebar bag, to attach my camera case using a steel wire hanger. It was always very annoying having the camera bouncing around the bag together with everything else. So by securing it in the middle, it’s very easy to access but also keep in place anything else I throw in to the bag.
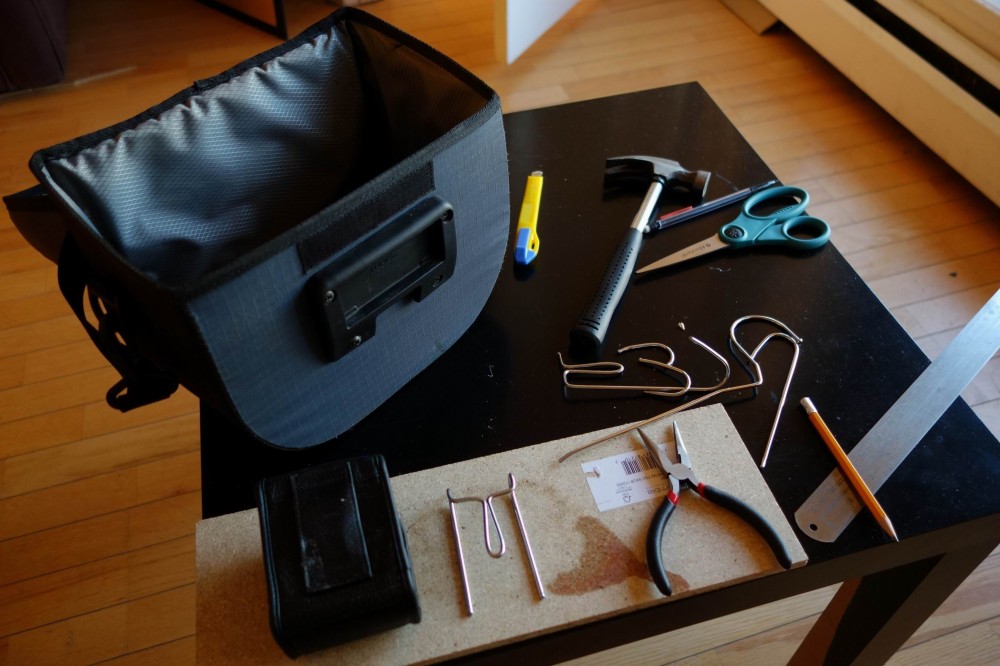

DIY camera case attachment
So here it is, the fully loaded bike, ready for the trip.
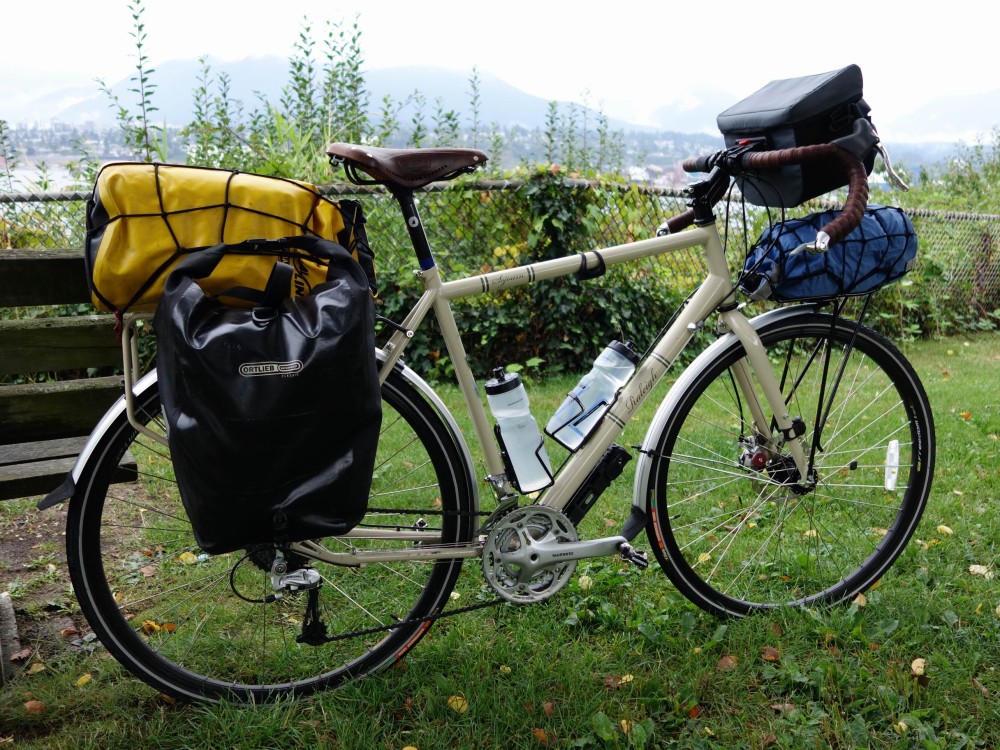
The final layout of the bike and the gear on top of it
I have to say right now I am more than ready to go. The past couple of months have been nothing more than just planning and running boring errands while hangover, leaving me with not much time to think of what is coming ahead. I’ve just gone through my massive to-do list, said goodbyes to all my friends and dropped off my household stuff to the cargo company. Now it’s just me, my bike and the essentials, ready to hit the road.
Happy days!
=]